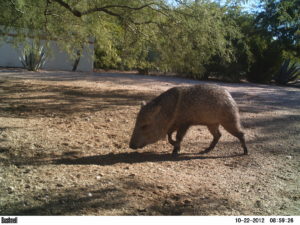
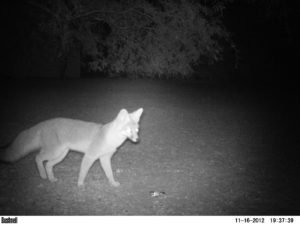
Enjoying a Morning Stroll
Much of what I’m going to be posting here on tricks and techniques regarding camera trapping will probably be common sense. Nonetheless, other things may be completely unknown to people just starting out in the field. Even I myself still have much to learn!
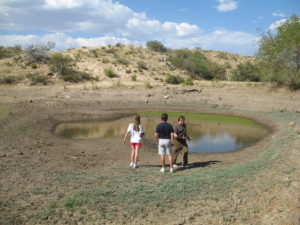
Water Areas Make for Ideal Camera Locations
One of the biggest questions that comes up in the field of camera trapping is which model to use. Frankly, there are many, many different brands out there, each with their pros and cons. Thus, it can be quite overwhelming when deciding which design to purchase. However, there is one website especially that I’d HIGHLY recommend when figuring out which type is best suited to your tastes and needs: TrailCamPro.com. Here you can find virtually every trail camera out there. Additionally, the website is highly organized and easy to navigate; shopping can be done via brand (Browning, Bushnell, Covert, etc.) or category (clearance items, red glow IR, white flash, best sellers, new products, etc.). Further, clicking on one particular type will bring up a remarkably thorough, detailed analysis on various aspects of the model, including picture and video quality, battery life on different settings, trigger speed and detection range, quality of camera design, an overall rating with all pros and cons neatly listed, and, best of all, sample recordings and photos together with customer reviews. Moreover, TrailCamPro reviews accessories as well (batteries, SD cards, security boxes to prevent theft, etc.). It is also possible to order from them, though I have found that many of their products can be bought for a cheaper price on Amazon or Ebay. Nevertheless, I couldn’t be happier with this website; it is a gem for anyone interested in wildlife research. As a side note, my personal favorite brand is Browning given the superb image and video qualities, respectable battery life, and quick detection circuit. It is also overall one of the best-selling designs out there, though more expensive. Bushnell isn’t bad either; however the very first camera I ever got (a “Bushnell Trophy Cam”) had grainier photos and videos and a slower detection circuit. Nonetheless, the brand has released better models since then. The take-home message, thus, is that it is important to do one’s homework prior to making a purchase.
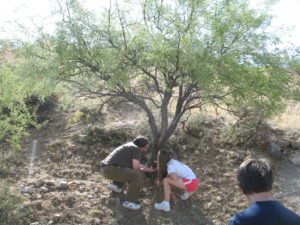
Setting the Camera in Place
The next topics I want to discuss are the important points to remember while setting up a trail camera in the field. When choosing a location, water areas are preferable as this is where animals will come to drink; this is especially critical in the desert where I live since annual average precipitation is very low. Such oases in arid regions can be found by searching for a mass of green plants in one spot; typically this will be at the foot of a mountain or in a valley stream bed where pools collect. Another idea is to head to a camping site and then take a hike off the main trail to a place where (hopefully) not too many people pass through and animal tracks are present. Additionally, when it comes to attaching the camera to something, trees are definitely recommended, though a sturdy rock could work as well as long as the strap does not come off easily (all in all, it also largely depends on where the instrument best blends in). After the device is firmly tied and facing in such a direction that animals will likely be photographed (note: some species are clever and walk behind the tree; coyotes are known to do this), I have found it quite useful to cut away any grass or branches directly in front of it. Wind moving through the region will cause vegetation to sway back and forth, resulting in false triggers. Nonetheless, it is wise to leave some brush as this will help conceal the device. Trail cameras are also designed to withstand the outside elements, so rain and snow shouldn’t be a concern.
Enjoying a (Very Early) Morning Stroll
Yet another talking point is regarding bait. While I myself have utilized this tactic in the past, I’m not entirely certain I will be continuing it in the future for all my studies. Throwing down raw meat that has been treated in a particular way (ex. preservatives), for example, could be potentially harmful to wildlife. On the other hand, there are alternatives to food. Perfume can also be used, of which Calvin Klein’s “Obsession” for men is popular (various big cats have been drawn to this scent). Some people argue that if a particular species is present in a given range anyway, then spraying a cologne won’t make much of a difference as the animal could have been photographed just as well without the lure. All in all, the take-home point is that the use of bait and its effect on achieving the most accurate results will vary depending on the study. For example, if one is talking about comparing data between two camera sites, it would probably be better to avoid using any kind of lure. However, researchers interested in capturing more images of a creature that they already know to be present in a particular location may employ a fragrance to draw the animal in.
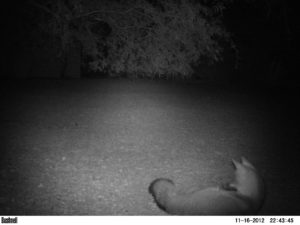
Holding Still for the Camera
With all of the above being said, one technique that I have found to be very useful when out in nature is keeping track of one’s work in a journal/notebook that is (preferably) exclusively dedicated to camera trapping/field research. For each location that I visit, I typically make two entries; the first is for when I set the device up. Here I record the exact site (with GPS coordinates), date, SD card size used, what settings the trail cam was on, battery power percentage to start with, and include a description of the region. When I return to pick the device up or simply switch out the batteries and SD card, I utilize the second entry and write down the date, how many photos/videos were taken, how much battery percentage was left, when the last image was taken, why the camera stopped recording if it didn’t last the entire time, and estimate about what percentage of the data was of humans, false triggers, and animals. I also take note of whether I changed out the batteries and SD card and moved the device to a new location. The more detail, the better; the only reason I’m still able to describe in my posts all the specific work I did is because I wrote it all down. While such thoroughness may not seem to be handy at the moment, one may never know when data could be useful years later.
Content As Can Be
Along the lines mentioned above, I would also encourage one to collect random data out in the field if the cameras are not being utilized for any specific research project at the moment. Additionally, if you have done this, DO NOT throw any of it away. Data that seems pointless when collected could be employed in beneficial ways later (see my post, “No Room In Avilla (SARSEF 2016)” for one such example). Finally, it is imperative to be well organized by keeping track of where and when you went out and what particular cameras/settings you used. Saving image files in more than one location (two at the least, though I go with three) is critical too. If not, you risk losing valuable information; I lost two assortments of data when I first started because of a failure to save the pictures in several locations.
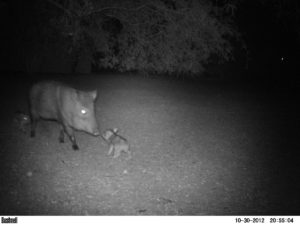
Mother and Child
Some other small side notes to remember when heading out into the field are as follows: it is not recommended to go hiking in extreme weather conditions that could potentially be dangerous. These may include severe thunderstorms or searing heat (temperatures where I live can soar to well over 100 degrees Fahrenheit (~38 Celsius) in the summer). Once I made the mistake of waiting too long to set up my camera; by the time I was ready, it was already too hot and I had to wait several months prior to heading back into the field. Avoiding being out at night is important as well; I once captured a photo of a puma after dark and then got another one of some human hikers several days later at the same time and place that the cougar had been at. Finally, it is imperative to (obviously) take lots of water, bring a phone with a charging stick/cable (preferably), and never go alone when setting up cameras. Something could always go wrong and having a companion there is the best way to ensure everyone’s safety.
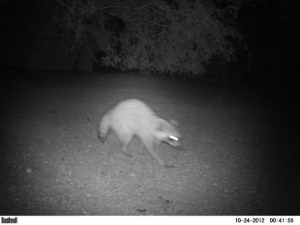
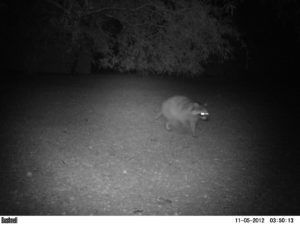
Clearly a “Morning Species”
The final topic I want to discuss on this page is preventing theft/purposeful damage of cameras. Obviously, some areas will be at higher risk than others. Where I live near the Mexican border, for example, trail cameras are frequently stolen or broken given that illegal immigrants don’t want to be caught on photo. Other people simply take the device to sell it online. All in all, one point must be made clear: there is always a risk when setting out a camera trap of not finding it anymore upon returning to the site; often humans and animals use the same travel corridors/paths, which complicates the situation. Nonetheless, there are a couple strategies that can be utilized to help reduce the likelihood of this occurring. One tactic is to program the instrument to infrared night mode instead of flash; this will make it less noticeable to people out after sunset (though images will then be black and white, not colored). Further, some brands have an even better option: a no-glow infrared setting that won’t light up at all when taking a picture. Photos will also still be illuminated (though slightly grainier). A second idea is to tape a notice on top of the device that reads, “Science Project: Please do not Disturb.” I moreover put my name and phone number on the inside in case it is stolen and just so happens to end up in the hands of someone willing to return it (as a side note, I tape a label on the back too with the camera name; I name all my devices ;). Despite these various tactics, though, the one that is definitely among the most effective in preventing theft is utilizing a security box and python cable/lock. Nearly all companies that make camera traps also create cases of steel that neatly house the instruments. Python cables are additionally incredibly useful to attach this box to a tree. They too are made of (braided) steel and require a key to open the connected lock. While the camera may still be damaged (via someone hitting the LED IR flash), theft is far less likely as the only way to remove the device would be to bring a large set of pliers to cut through the cable. The one downside, however, is that cases of a particular company will only fit cameras made by the same corporation or even of a specific design within the brand (no “one-size-fits-all” here).